
Most new residents arrive with a mental list — get the residence card, open a bank account, register at the town hall, sort out healthcare, connect the utilities — but no clear sense of the order. That is the single biggest source of wasted trips and missed appointments in the first three months. In Spain the steps are chained: you generally need an address before you can register on the padrón; you often need the padrón before certain TIE appointments; you need an NIE or TIE for many bank, phone and utility contracts; and you need a bank account before you can set up the direct debits those contracts rely on. Getting the sequence right is worth more than getting any single step done quickly. This guide walks through the first 90 days as phases, and flags what depends on what, so your calendar in Spain works with the administration rather than against it.
On this page
Before you fly: the arrival mindset Week 1: entry, address and immediate steps NIE, padrón and why the order matters The TIE appointment window Setting up banking and utilities Healthcare and insurance continuity The tax-residence clock and what to note Building your renewal file from day one Common sequencing mistakes Frequently asked questions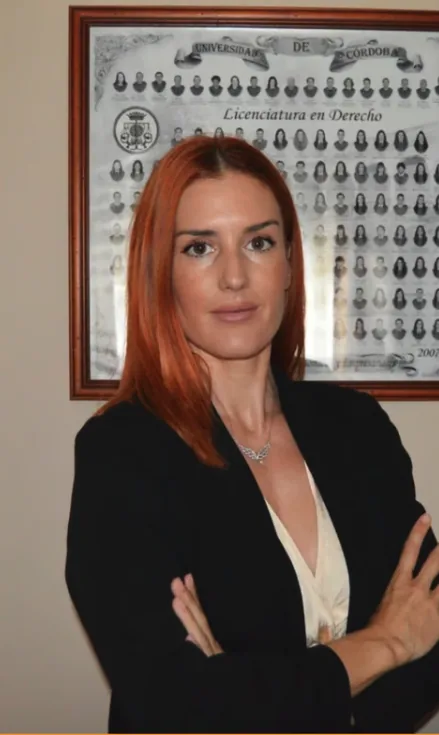
"Your first ninety days in Spain are a chain, not a checklist — you generally need an address before the padrón, and the padrón before much else. Get the order right and you save yourself the wasted trips that catch out almost every newcomer."
— Lola Jurado · Immigration lawyer, Ilustre Colegio de Abogados de Málaga (nº 10907)
Before you fly: the arrival mindset
The first 90 days are easier if a few things are settled before departure. Confirm the exact validity dates on your visa sticker and note the entry deadline, because for several routes the clock to apply for the physical residence card starts on the day you enter Spain. Decide where you will actually sleep in week one — a fixed address, even a short-term rental with a named contract, is far more useful than a hotel because the padrón and many later steps hinge on address evidence. Bring more certified copies of core documents than you think you need: passport, visa, birth and marriage certificates where relevant, proof of income and your health-insurance policy. Photocopies are cheap; a second transatlantic courier is not.
It also helps to know your NIE before you arrive if your route already assigns one. The NIE (Número de Identidad de Extranjero) is the identification number that threads through every administrative and private-sector step in Spain. On many visas it already appears on your paperwork; on others you obtain it after arrival. If you are unsure which applies to you, our note on how to get a NIE in Spain explains the routes, and the difference between the number and the card is set out in TIE vs NIE.
Week 1: entry, address and immediate steps
Your date of entry is the anchor for everything that follows, so record it. Keep boarding passes and let the passport receive its entry stamp where applicable; those records establish when your residence period — and, separately, your tax presence — began. In the first days, prioritise three things in this order: confirm a stable address, gather the documents that address will let you register, and start booking the appointments that tend to fill up.
Appointment scarcity is the hidden constraint of the first month. In busy provinces, TIE and some town-hall slots can be booked out for weeks, so the practical move is to open the appointment portals in week one even if you are not yet ready to attend. Securing a future slot early, then assembling the file to match, is almost always better than waiting until every document is perfect and finding no dates left. Treat week one as logistics: address, documents, and calendar.
NIE, padrón and why the order matters
This is the section where most timelines succeed or fail. Three items — the NIE number, the empadronamiento (padrón) and the TIE card — are frequently confused, and their order is not interchangeable. The NIE is your number; the TIE is the physical card that carries it and proves legal residence; the padrón is your registration on the municipal roll at your town hall. The padrón is not immigration itself, but it feeds immigration: several TIE offices require a recent padrón certificate as address evidence, so registering on the padrón usually comes before the TIE appointment rather than after it.
The padrón is handled by the ayuntamiento (town hall) and links you to a specific address. Requirements vary by municipality, but you commonly need a rental contract or property deed — or written authorisation from the person who holds the housing contract — plus identification. Our step-by-step walkthrough is in the empadronamiento guide. Once you hold the padrón certificate, you can complete the TIE file, and the certificate is then reused for healthcare registration, school enrolment and later renewals. Doing the padrón early therefore pays off several times over.
Get the address, then the padrón, then the TIE, then the bank, then the direct debits. Each step unlocks the next; skip one and you simply return to it, having lost an appointment.
The TIE appointment window
The Tarjeta de Identidad de Extranjero is the card that proves your right to reside. For routes where you enter on a national visa, guidance commonly requires you to apply for the TIE within one month of entry, which is precisely why booking the appointment in week one matters so much. The typical file includes your passport, visa, the application form, proof of the fee (tasa) payment, recent photographs in the required format, address evidence and, where requested, your padrón certificate. Local practice varies between provinces, so confirm the current list for the police station where you will apply before you attend.
The process normally runs in two stages: a fingerprinting appointment, and later collection of the finished card. Keep every receipt and resguardo, because that paperwork is your proof that you applied on time and, in the interim, your evidence of legal status. If you are arriving as a couple or family, book a separate appointment and prepare a separate file for each person, and coordinate the dates so nobody is left uncovered. For a fuller comparison of the number and the card — and why you cannot substitute one for the other — see TIE vs NIE in Spain.
Setting up banking and utilities
Banking sits deliberately after the identity steps, because Spanish banks will want your NIE or TIE, proof of address and, increasingly, evidence of income and tax residence before opening a resident account. Trying to open the account before you hold those documents usually stalls onboarding. Once you have them, the account becomes the hub for the rest of your setup: it is what utility companies, insurers, phone providers and the town hall will direct-debit. In other words, the bank account is a dependency for almost every recurring contract, which is why it belongs early in the second phase rather than the first. Our practical walkthrough is in opening a bank account in Spain.
US citizens and others from jurisdictions with enhanced reporting should expect extra onboarding questions — FATCA or CRS declarations, source-of-funds queries and proof-of-address checks are routine, not a red flag. Prepare clean copies of passport, NIE or TIE, proof of address and proof of income so the process does not restart for a missing page. With the account live, connect utilities in a logical order: electricity and water first, then internet, then mobile. Each contract will ask for the NIE and a Spanish IBAN, so setting up the bank first genuinely saves repeat visits — the mechanics of the electricity, water and gas contracts, including the free cambio de titular and the comercializadora-versus-distribuidora split, are covered in setting up utilities in Spain. Getting online has its own choices — coverage that varies by address, and the permanencia lock-in — set out in our guide to home internet and fibre. For the phone itself a prepaid SIM on your passport works from day one, as our guide to getting a Spanish mobile number and SIM explains. The screen comes last: expect your US streaming and TV to shift catalogues and, in some cases, stop working entirely once your connection is Spanish.
Healthcare and insurance continuity
Whatever route you came on, do not let a healthcare gap open up in the first 90 days. If your visa required private health insurance — as the non-lucrative and some other routes do — that policy must remain active and compliant, and it will be reviewed again at renewal. The safest profile is full cover in Spain with an authorised insurer, no co-payments and no exclusions that undermine equivalence with public healthcare. Review the policy after arrival: check the dates, the family members covered, territorial scope, waiting periods and exclusions, and renew it before it lapses rather than after.
Employees and self-employed residents who contribute to Spanish social security follow a different path and register for public healthcare once contributions begin, typically using the padrón certificate and social-security number. The common thread across every route is continuity: your file should show unbroken cover from entry onward, whether private, public or a bridge between the two. For non-lucrative residents, the dedicated note on empadronamiento, TIE and the regional health card sets out why the padrón helps but does not itself create healthcare entitlement. Keep proof of every policy and every registration, because a clean healthcare timeline is one of the quietest strengths of a renewal application.
The tax-residence clock and what to note
Immigration status and tax status are separate questions, and the first 90 days is when the tax clock quietly starts. Spanish tax residence is assessed over the calendar year, and spending 183 days or more in Spain during that year is one of the principal tests; tax residence can bring worldwide income into the Spanish net. From arrival, note your entry date and keep a simple log of days in and out of Spain, because that record settles a surprising number of later questions. The details of the day-count test are in our note on the 183-day tax-residency rule.
The right planning depends on your route. A non-lucrative retiree with US Social Security, IRA distributions and a brokerage account faces a very different picture from a Beckham-regime employee, whose special election can change how foreign income is taxed for a fixed period — but only if elected correctly and on time. A digital nomad or self-employed resident has yet another profile. None of this is settled by the immigration approval; the approval grants residence, not a tax outcome. Reviewing the position early, ideally before large asset movements, is far cheaper than unwinding a mistake later.
Building your renewal file from day one
The first renewal always arrives sooner than new residents expect, and the strongest files are the ones assembled in real time rather than reconstructed in a panic. From week one, keep a single folder — physical or digital — holding your padrón certificate, rental contract or deed, TIE receipt and card, insurance policies and renewals, bank statements, proof of income and any correspondence with the administration. Add to it as you go. A renewal that shows a clean, dated timeline — entry, padrón, TIE, continuous insurance, stable means, genuine residence — is far more persuasive than a stack of documents gathered at the last minute.
| Phase | Priorities in order |
|---|---|
| Before you fly | Confirm visa dates and entry deadline; secure week-one address; carry certified document copies. |
| Days 1–7 | Record entry date; confirm stable address; open appointment portals; gather padrón documents. |
| Weeks 2–4 | Register on the padrón; attend the TIE fingerprinting appointment; keep insurance active. |
| Weeks 4–8 | Collect the TIE; open the bank account; connect utilities and set up direct debits. |
| Weeks 8–13 | Register healthcare as applicable; note the tax-day count; start the renewal folder. |
Each route has its own detail work to slot into these phases. Non-lucrative residents should read our companion piece on what happens after non-lucrative visa approval, and anyone weighing the underlying route can review the pillar guide to the non-lucrative (retirement) visa. The phases above are the frame; the visa-specific guides fill in the requirements.
Common sequencing mistakes
Nearly every first-90-days problem we see is a sequencing error rather than a substantive one. The classics: booking a TIE appointment before registering on the padrón, then being turned away for missing address evidence; trying to open a bank account before the NIE or TIE is in hand; signing a utility or phone contract before the Spanish bank account exists, so there is no IBAN for the direct debit; treating a hotel as an address and finding the padrón blocked; and letting health insurance lapse in the gap between arrival and registration. Each of these means a repeat trip and, often, a lost appointment slot that is hard to rebook.
The fix is the same in every case: respect the chain. Address unlocks the padrón; the padrón unlocks the TIE; the TIE unlocks banking; banking unlocks contracts; and a contemporaneous folder unlocks the renewal. Map your 90 days to that order, book the scarce appointments first, and keep insurance and the day-count running quietly in the background. Done in sequence, the first three months feel controlled rather than chaotic — which is exactly the impression you want your file to give when the renewal comes around. One reward waits at the end of the chain: once the TIE is in your wallet you can finally travel around Europe on your residence card, which is far harder in the fragile gap before the card is issued.
The same chain governs a question that only comes up once people are settled: the residence card is also the gateway to a Spanish weapons licence, since those can be issued only to Spaniards and to foreigners resident here. If hunting or sport shooting is part of the plan, the firearms page sets out what the card unlocks and what remains closed.
One item belongs on this list only for some households, and it has a hard deadline of its own: if anybody is going to work in your home — a carer, a housekeeper, a live-in helper — the registration must be done before their first day, and it cannot be done retroactively.
Finally, a note for month four onwards. Almost everything on this list is a one-off, but two of the obligations it creates are permanent: the residence card has to be replaced immediately if it is lost, stolen or damaged, and any change of your habitual address has to be notified to the police within a month, on top of re-registering at the new town hall. Neither is difficult; both are commonly missed, and the second is the one that quietly derails a renewal. See lost cards and changes of address.
Two American obligations belong on this list even though nothing in Spain triggers them. Decide early what happens to court post sent to your old US address, because a jury summons is served validly by ordinary mail and the sanction attaches to not responding, not to not serving. And if there is a son in the household approaching eighteen, put the date in the calendar now: Selective Service registration runs on a sixty-day window around the birthday and closes for good at twenty-six. Both are covered in jury duty and Selective Service when you live in Spain.
Frequently asked questions
What is the very first thing to do after arriving in Spain?
Secure your address and start your appointment planning immediately. In most towns the padrón (municipal registration) is the foundation step, because many TIE appointments and local procedures ask for it. If your visa route requires a TIE within one month of entry, book that appointment early because slots can be scarce.
Do I need the padrón before the TIE?
It depends on the province, but in practice the padrón often comes first because several TIE offices ask for a padrón certificate as address evidence. Even where it is not strictly required, registering on the padrón early makes later steps — TIE, healthcare, banking and renewal — smoother, so treat it as an early priority.
Why does the order of steps matter so much in the first 90 days?
Because the steps depend on each other. You usually need an address before the padrón, a padrón before some TIE appointments, an NIE or TIE before many bank and utility contracts, and a bank account before you can set up direct debits. Doing them out of order means repeat trips and wasted appointments.
When does the Spanish tax-residence clock start counting?
Spanish tax residence is tested over the calendar year, and spending 183 days or more in Spain in a year is one of the main tests. The clock effectively starts from your arrival, so note your entry date and keep travel records from day one, especially if you have foreign income or a Beckham election to consider.
Should I start my renewal file in the first 90 days?
Yes. Whatever your visa route, the first renewal arrives faster than expected. From day one, keep your padrón certificate, rental contract, TIE receipt, insurance documents, bank statements and proof of income. A clean, contemporaneous file is far easier to assemble than one reconstructed a year later.
General information, not legal or tax advice. Appointment availability, documentary requirements, healthcare registration and tax consequences vary by province, visa route, timing and personal facts. Confirm the current process before relying on it.